


Tile Fixing Instructions
Before fixing the tiles, lay them out in the desire pattern and make sure that they give an acceptable blend of shade, colour & design. Also make sure that the tiles are acceptable to your satisfaction. Please note that certain amount of shade and size variation is inherent in the manufacturing of ceramic products.
For fixing these tiles, we recommend the use of ARDEX ENDURA tile fixing adhesives. For best result, follow the tile fixing instruction provided along with the adhesives.
For fixing Johnson Endura tiles on the floor using sand and cement, follow the instruction given below:
Use cement and sand mortar in the ratio of 1:4. Add some water to create a consistent paste.
Do not add any further water to the mix once it is completed and use the same within one hour.
IN THESE INSTRUCTIONS IS A SUBSTITUTE FOR GOOD WORKMANSHIP AND SUPERVISION.
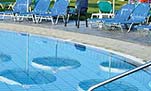
* For specific tile fixing instructions related to industrial tiles, swimming pool tiles, pavers and anti-static tiles, please visit the website www.enduratiles.com
Apply a 20mm to 30mm layer of bedding material over an area of 1 square meter at a time on the surface of the area. Apply a fine slurry to the back of the tile to ensure proper and full bedding. Press gently for even adherence at back of the tile.
For fixing Johnson Endura tiles on Dado, we recommend the use of tiles fixing adhesive from ARDEX ENDURA. Please follow the manufacturer's instructions for the same. We do not recommend the use of sand and cement for fixing on dado.
Mark and layout the tiles from the centre of the area to be tiled so that cut tiles if any will be on the outer edge towards the walls.
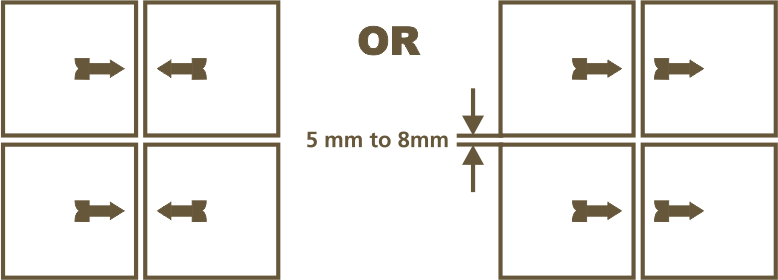
The nominal/work size of the tile is an printed on the carton. It is advisable to maintain a gap of 5 mm to 8 mm between two tiles to allow for possible explosion as per ISO tolerance norms. This would give the coverage area as mentioned in the grouts.
Complete the tiles laying process by pressing the cut Johnson Endura tiles firmly into place along the wall/floors.
Allow 3 to 4 days for bed curing. After this period, fill the joints with cement ious or epoxy grouts from ARDEX ENDURA.
Fifteen minutes after finishing the grouting process, wipe off excess grout with a damp sponge and polish the tiles with a soft and dry cloth for a clean surface. The tiles can also be cleaned with a mild acid (However Hydrofluoric acid and its derivatives should not be used). You can also use tile & stone cleaners from ARDEX ENDURA.
Please note that company does not accept any liability in case of problems arising out of non - adherence to these fixing instructions.
It is ideal to provide 5 mm to 8 mm gap between tiles with the help of spacers.
Kindly look for an arrow (-->) on the back of the tile and follow the laying pattern as shown below.
THE COMPANY WILL NOT BEAR RESPONSIBILITY AFTER THE TILES ARE FIXED.
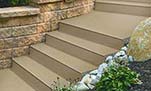
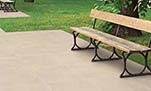
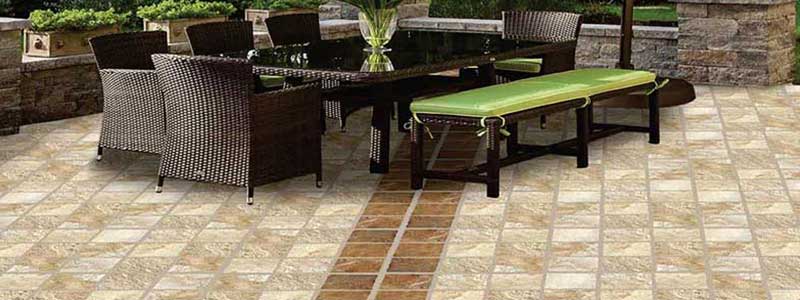
Outdoor Tile Fixing Instruction
RAISED FLOORING WITH SUPPORTS
The raised installation allows for the creation of a technical gap of variable height between the substrate and the foot plan. It can be replaced and inspected at any time without damaging the surface and allows wires, pipe ducts and lighting systems to be concealed.
DRY INSTALLATION GRAVEL
The dry installation allows for the positioning of the slabs directly onto substrates in gravel to create pedestrian pathways that can be immediately walked upon. This type of application is easy 8, quick and does not require the use of adhesive for installation.
TRADITIONAL ADHESIVE SYSTEM
The traditional adhesive installation onto screed guarantees an excellent breakage load than. to the performance of 20mm thickness. This installation method represents the perfect solution for carriageable lanes as well as lanes with vehicular movement.
DRY INSTALLATION SAND
The dry installation allows for the positioning of the slabs directly onto substrates in sand to create pedestrian pathways that can be immediately walked upon. This type of application is easy & quick and does not require the use of adhesive for Installation.
DRY INSTALLATION GRASS
The dry installation allows for the positioning of the slabs directly onto substrates in grass to create pedestrian pathways that can be Immediately walked upon. This type of application is easy & quick and does not require the use of adhesive for Installation.


